A storyboard is several frames of one story. First cheap pictures (easy to fix), then animation and voiceover. The main screen builds a whole video of up to 10 frames, and the quick path (simple mode) voices one frame in five steps.
Checked against the interface: ·
In short
Main screen (default): script from an idea, edit and animate every frame, voiceover, Make the reel from several clips, up to 10 frames.
Quick path: turn off the “Advanced mode” switch — frame → text → voice → one Озвучить кадр button.
The ⚡ price is on every button before you press it. A storyboard autosaves.
1A storyboard from an idea (the main screen)
This screen opens by default: the “Advanced mode” switch at the top right is on. Your choice is remembered in the browser.
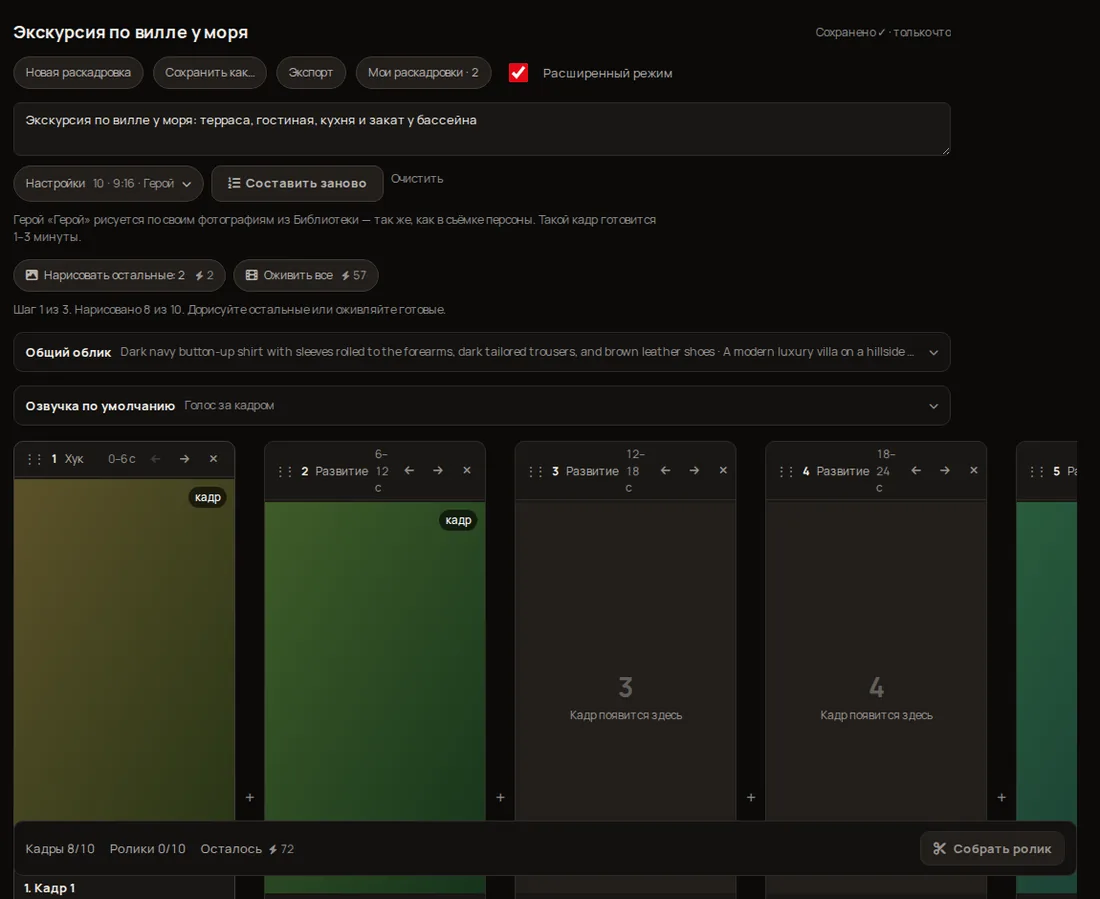
Advanced mode: idea, settings, shared blocks and a row of frame cards.
Describe the idea
In the “Story” field write a sentence or two: “a courier on a bicycle is late, cuts through the market and reaches the door in the last second”. Or press one of the ready examples.
Set “Settings”
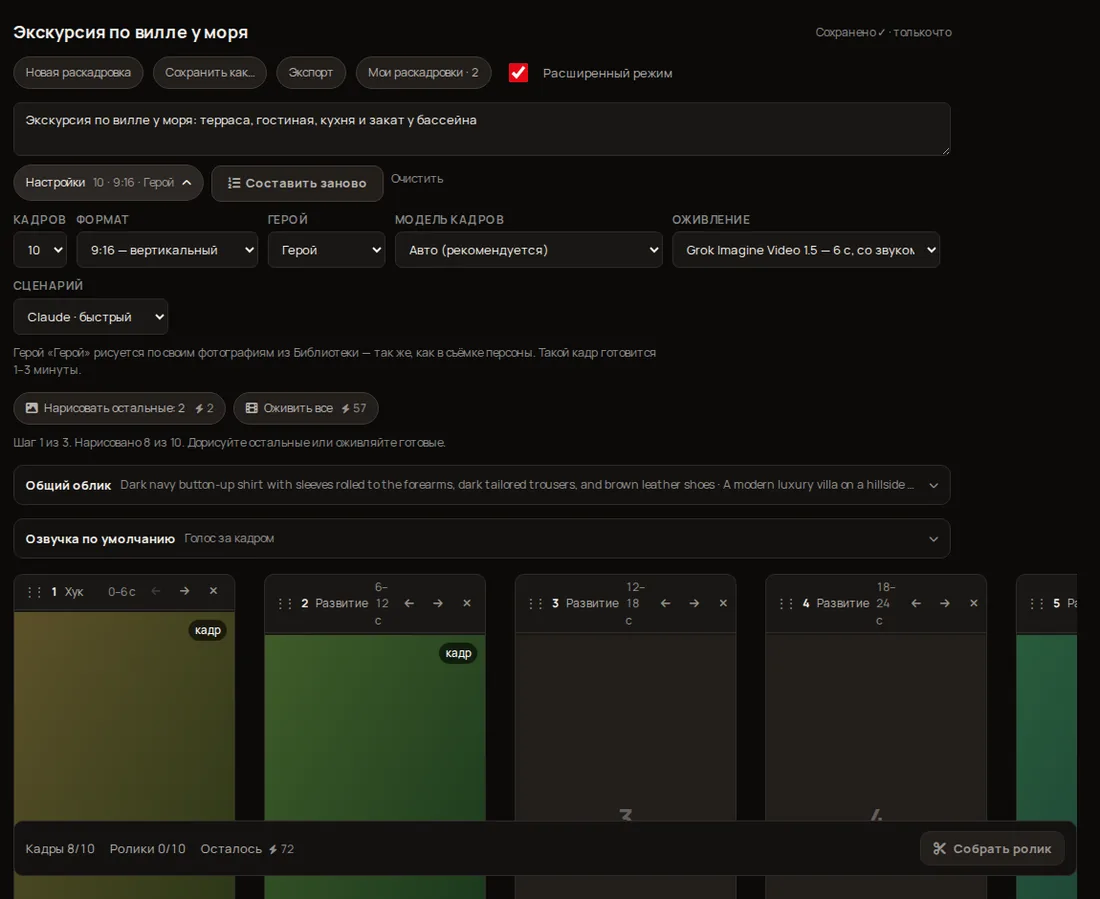
The “Settings N · 9:16 · Hero” button opens: Frames (3–10), Format (9:16 vertical or 16:9 horizontal), Hero (a persona from the Library or none), Frame model (“Auto (recommended)” or Nano Banana 2.1, Grok Imagine 2, Grok Imagine, Nano Banana Pro, Seedream 4.5, FLUX 2 Max), Animation (Grok Imagine Video 1.5, Seedance 1.5 Pro, Wan 2.6 Flash, Kling 2.1 Standard, Kling 2.5 Turbo, Seedance 2.0 Mini, Veo 3.1 Lite) and Script (who writes it: Claude, ChatGPT or Gemini).
Press “Create storyboard”
The assistant writes the script in 10–30 seconds: frames with a role (Hook → Development → Finale), timing (0–6 s, 6–12 s…), a description, a shot type and voiceover text. The button then reads Create again; “Clear” starts from a blank page.
Set the “Shared look”
The “Shared look” block (the hero’s outfit and the place and light) is appended to every frame so clothes and setting do not change from frame to frame. English works best — the model understands it more accurately.
Draw the frames
Draw the rest draws every frame not drawn yet (⚡ price on the button; each card has its own). If a hero is set, their frame is made from their photos in the Library (1–3 minutes), so the likeness holds. Every frame shows its state: queued → drawing → ready / error with “Retry”.
Animate and voice
Next come the sections below: “How to animate a frame”, “Voicing a frame” and “How to assemble the video”.
Storyboard “Settings”.
2How to redraw a frame
Open Prompt for the model on the card and fix the description: what is in the frame, light, angle.
Press “Reshoot frame ⚡N” — the old frame is replaced by a new one (on drawn frames the button is called this; on empty ones it is “Draw”).
“Tune frame” → “Frame model”: pick another model for this frame only (“Default” is the shared one from Settings).
If a frame “failed”, the card has “Retry” — tokens for a failure are returned.
Order and set:the ← → arrows on a card or dragging change the order, ✕ deletes a frame, “+ add frame” between cards inserts a new one. While frames and clips are in progress the structure is locked.
3How to animate a frame
Only a finished frame can be animated: “Animate ⚡N” on the card or “Animate all” for everything. With no frame yet the button says “Draw the frames first”.
In “Tune frame” → “Character behavior” describe only the motion (“turns to the window, smiles”). The look is already in the frame — do not repeat it.
The animation model is chosen in Settings or per frame. Clip length depends on the model (4–6 seconds): Grok Imagine Video 1.5 — 6 s, with sound; Seedance 1.5 Pro — 4 s, no sound; Wan 2.6 Flash, Kling 2.1 Standard, Kling 2.5 Turbo, Seedance 2.0 Mini — 5 s each; Veo 3.1 Lite — 4 s.
To redo, press “Animate again”. Do not relaunch while a frame is being animated: the clip appears by itself.
4Voicing a frame and choosing a voice
Default voiceover (the block under Shared look) applies to all frames: “Voice-over” or “Speaks on camera”, a voice choice, “Volume”, “Pause before” and “Pause after” sliders and a “Listen” button.
Voice-over: the clip stays without speech and the voice is laid over at assembly. It is cheaper and lips never drift from the sound. Speaks on camera: the text goes into the animation and the model speaks itself (it needs a model with sound — Seedance 1.5 Pro has none) and picks the voice itself.
For a single frame: “Tune frame” → “Voiceover text” and its own voice (or “as in common”). Voicing at assembly is paid per character — the price is shown beside it.
More on voices and cloning on the Voiceover and voices page.
5How to assemble the video
Animate at least two frames: the bottom button stays grey and says how many are animated.
The bottom progress row “Frames 8/10 · Clips 0/10 · Remaining ⚡N” shows how much work and money is left.
Press Make the reel (“Make the reel · clips: N”). The Studio voices the lines (when voice-over is chosen), joins the clips and saves the result to My generations. It takes up to a minute — keep the page open.
You can download under the finished video. To edit differently use Editing in the Video menu.
6Quick path: simple mode
For one frame with a line: turn off the “Advanced mode” switch at the top right — a simple four-step screen opens.
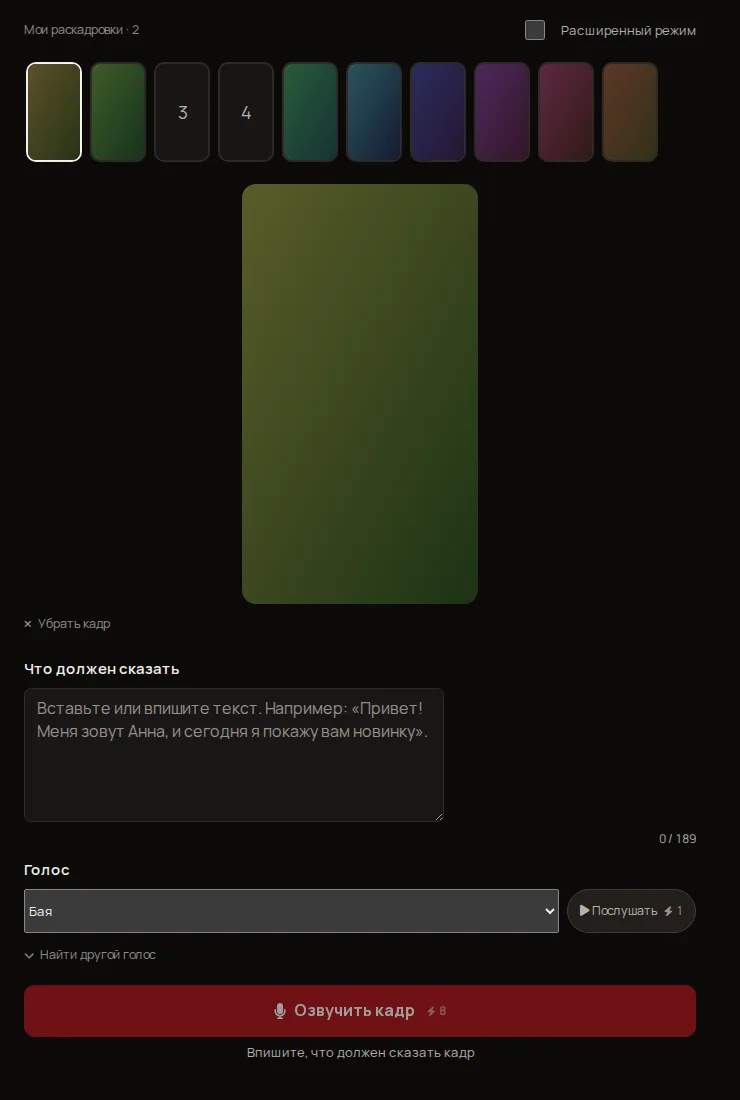
The simple screen. Frames in the screenshot are placeholders (your pictures are visible only to you).
Open the storyboard
Top menu: Video → Storyboard; or My storyboards in the left menu. Turn off the “Advanced mode” switch at the top right — the simple screen opens: a strip of frames on top, the selected frame under it, the “What should it say” field, a voice picker and one big button.
Pick a frame
Press the “+” tile in the strip: upload a picture (JPG, PNG, WebP), take one “From my pictures” or Draw it from a description (the ⚡ price is on the button). Up to 10 frames in the strip; each frame is voiced separately.
Paste the text
Type the line in “What should it say”. A counter shows characters / limit and the approximate length in seconds. The limit depends on the clip length: the narrator speaks about 14 characters per second, and the last frame may freeze for up to 8 seconds. If the text is longer, the button asks you to shorten it.
Choose a voice
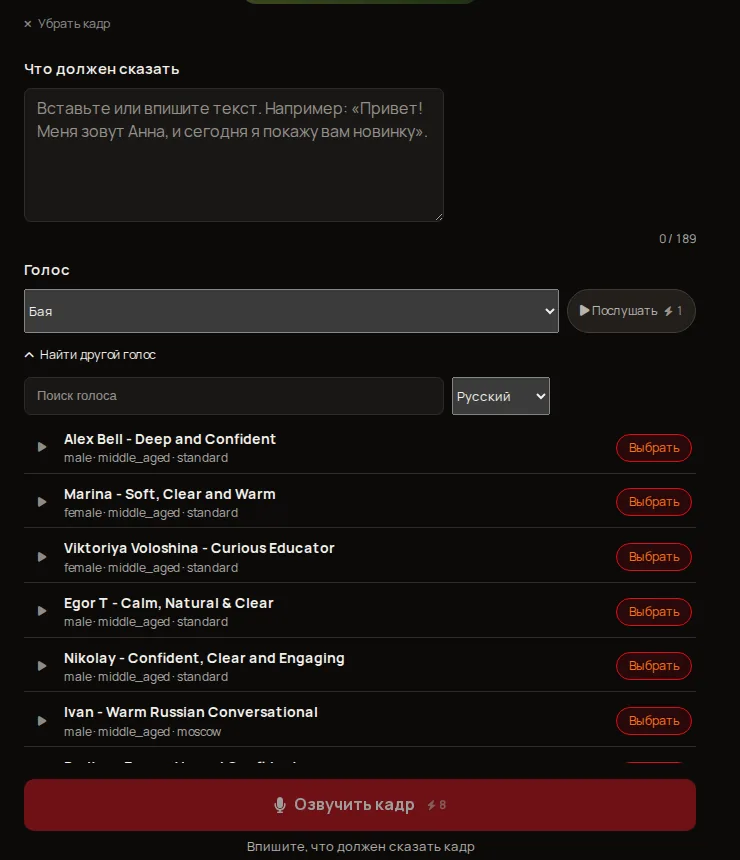
The “Voice” list already has a default voice, so the button is not dead on first open. It has groups “My voices” (your clones, if any) and “Ready-made voices”. Послушать (⚡1) plays a short sample. “Find another voice” opens a search of the ElevenLabs library: press ▶ to listen and Select — the voice is saved and chosen in one press.
Press “Voice the frame”
The ⚡ price next to the button covers animating the frame plus voicing. If your balance is short, the button shows “Not enough ⚡N” and a “Top up” link. If something is missing (frame, text, voice), the line under the button says what.
Get the video
It takes 1–3 minutes; you do not have to keep the page open. The frame first comes gently alive (breathing, small head moves, a slow push-in, mouth closed — the speech plays as a voice-over), then it is voiced and assembled. The result is under “Finished video” with a Download link; it is also saved to My generations and the frame tile gets a check mark.
“Find another voice”: a sample and “Select” on every voice.
Several frames:in the simple mode each frame produces its own video. To join them into one, turn the “Advanced mode” switch back on and press Make the reel (below).
7My storyboards: save and open
A storyboard autosaves: the status “Saved ✓ · just now” sits to the right of the title. You can edit the title right in the header.
My storyboards (in the left menu or the button next to the title) opens a list: search by title, “Recent” / “By title” sorting, ★ favorite, “Rename”, “Duplicate”, “Delete” (finished frames and clips stay in My generations). Up to 50 storyboards in total.
New storyboard creates an empty one, “Save as…” makes a copy.
“Export”: “Copy as text”, “Download .md”, “Share a link” (the link shows only the frame prompts, no pictures).
Storyboards from chat reach this list only on your button.
8A storyboard from chat
In chat the assistant can write a script (with timing and voiceover text), draw frames and animate them in batches, then “Open in Studio” to finish here. Details on the Chat and Studio together page.
9Cost and how not to overspend
The script is nearly free (it is text). Paid steps are pictures, animation and voicing; every button shows its ⚡ price.
Draw all frames and fix them first — animation costs more than a picture. Animate once you like the frames.
For a trial take 3–4 frames and a cheap animation model (Settings → Animation: model notes such as “cheaper” and “half the price”).
Voice-over is cheaper than “Speaks on camera”; voicing is priced per character.
If your balance does not cover everything the Studio warns you (“The balance may not cover all frames at once”) — launch in parts. Tokens for failed frames and clips are returned.
Prices are not quoted here on purpose: they change; trust the buttons.
?FAQ
Are simple and advanced modes different storyboards?
No — the same document in two views. The “Advanced mode” switch only changes the set of elements on screen.
The “Voice the frame” button is grey — why?
The reason is written under the button: no frame, no text, text longer than the clip, no voice chosen, other work in progress or not enough ⚡.
The hero looks wrong in frames
Choose “Hero” in Settings (a persona from the Library), add photos to the persona and redo the frame. See the Personas page.
The video has no sound
Check the voice mode: “Speaks on camera” needs a model with sound; for “Voice-over” the speech is added at assembly — the line text and a chosen voice are required.